Basic enameling is shift powder glass to clean metal and fire to fuse. End of story……….
Just kid

ding! But really, it’s that easy and finished piece would look fabulous!
I began making jewelry over 10years ago. From bead stringing to pearl knotting, wire wrapping… I tried many different techniques. But it was always with beads that I bought from somewhere. I wanted make beads and focal my self. I wanted my jewelry to be truly *ME*

So I took polymer clay class at local art center. While it was fun to make stuff with polymer clay, I felt it really wasn’t for me. It’s just so heard to make them look nice & professional. So I moved onto enameling class and I was hooked! That was about 2 years ago. I’m still taking the same class every week. (it’s just so fun & I love be in there…) And I was using torch to enamel at home for long time but I finally got my own kiln!
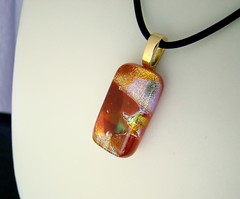
Ok, enough about me… what is enameling? Enameling is ancient art of fusing glass to metal. I love how they say in Japanese. In Japanese, 七宝焼 (shippouyaki), 七宝 (shippou) meaning “seven gems” because with enamel, you can achieve beauty of the seven gems.
Enamel usually comes in powder. You can shift or mix it with water and paint onto metal such as copper, silver (fine silver) or gold. Copper is more popular but I love it on silver too. Especially transparent colors are great on silver. After you apply enamel on metal, make sure it’s all dried, and then you fire them so they will melt and fuse to the metal when it’s cooled off. In kiln 2-3 minutes around 1500-degree. With torch you can only fire small pieces but takes about same amount of times.

Enamel comes in so many different colors. Just to try some color combination is exciting! If you are familiar with metal work, you can prepare your metal with your own shape and texture but if you are not, don’t worry! There are all kinds of pre-cut metal shape that you can get!! And even with just a circle and basic techniques, you can get the most amazing result!
Here is excellent online totorial by Copperheart http://copperheartdesigns.blogspot.com/2008/05/tutorial-intro-to-enameling.html
If you are more like book preson, I recommend this awesome book
The art of enameling by Linda Darty
And some online resorce for enameling material
Thompson Enamel http://www.thompsonenamel.com/

METALLIFEROUS http://www.metalliferous.com/
Enjoy:)

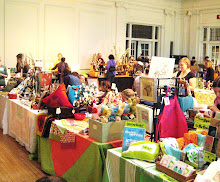
 Last weekend was the unveiling of a city-wide public art project-


 With this technique I could add glass details around the cubs face without them being sharp shards of glass, and kids or general public could run thier hands over it and really feel the smooth glass. I wanted it to be touchable!
  You can see how smooth they are, and the raised areas, in the photo above.
 The photo above was taken at my house, prior to being installed in front of the town liquor store (first photo). He's hiding.
 Heres a link to a video taken by the local news station. Mines the first one in the video, the little green one. Then Im at the very end in the "Nature" shirt, hamming it up next to my bear while people took photos (and apparently the local news was there too!).